Step 3: Draw the Cutting Lines
Procedure
- Draw the cutting lines.
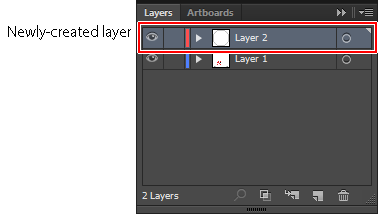
Create a new layer for the cutting lines and draw the cutting lines there.


- Save the data.

Procedure
Create a new layer for the cutting lines and draw the cutting lines there.


What the GS-24 can be Used For
Step 4: Install the Blade Holder
Preparations for Printing and Cutting (When Using Illustrator)
Printing and Cutting Procedure (Illustrator)
Step 1: Set the Printing and Cutting Areas
Step 2: Position the Sample Data
Step 3: Draw the Cutting Lines
Step 5: Load the Printed Material
Setting the Margins and the Distance between Crop Marks
Printing & Cutting (Manual Mode)
Step 1: Create Crop Mark Data Manually
Step 3: Load the Printed Material
Changing the Language Used for the Display
Initializing All Settings to Their Default Values
Checking the Machine Status (Self Test)
Changing the Contrast of the Display Screen
Moving the Cutting Carriage at High Speed
Cutting the Same Object Repetitively
Step 1: Prepare the Data for Recutting
Optimizing the Cutting Quality for the Material/Preventing Misaligned Cutting
Adjusting the Cutting-in Amount
Setting the Cutting Conditions
Setting Cutting Quality (QUALITY)
Setting the Amount of Offset for the Tip of the Blade (OFFSET)
Setting the Direction of the Coordinate Axis for Cutting (ROTATE)
Extending the Cutting Area (WIDTH EXTEND)
Setting the Speed of the Blade During Cutting (UPSPEED)
Cutting Detailed Characters and Complex Shapes
Cutting in the Same Position Repetitively (Overlap)
Cutting Corners Cleanly (Over Cut)
General Guide Regarding Cutting Conditions
Preventing and Correcting Misaligned Cutting
Flat Material Cannot be Set Up using "PIECE" (Length is not Displayed)
The Material Slips Away from the Pinch Rollers While Cutting
The Results of Cutting are Displaced when Using the Printing & Cutting Function
Uncut Areas Remain or Cut Edges are not Clean
The Machine Cuts the Carrier Paper
Roland DG Corporation Copyright © 2015 Roland DG Corporation All Rights Reserved. R1-150109