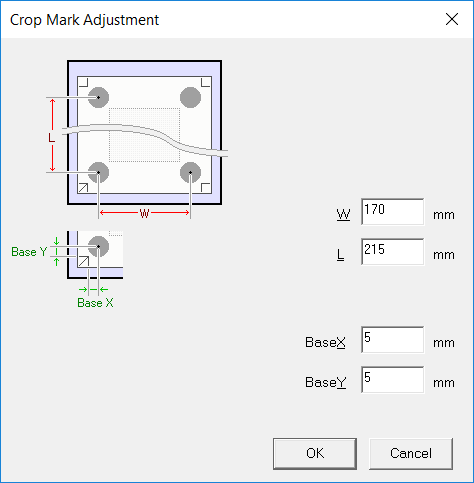
Adjust the Base X and Base Y values to eliminate the offset, and then click OK.
Do not change the W and L values at this point.
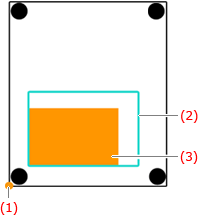
Align the position with respect to this side.
|
 |
(1): Origin
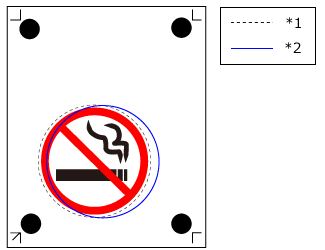
(2): Cutting line
(3): Printing position
|
The Cutting Position Is Offset to the Left or Right of the Printing Position
Change the Base X value. If the cutting position is offset to the right of the printing position, increase the value; if it is offset to the left of the printing position, decrease the value. In the case shown in the above figure, increase Base X.
The Cutting Position Is Offset above or below the Printing Position
Change the Base Y value. If the cutting position is offset above the printing position, increase the value; if it is offset below the printing position, decrease the value. In the case shown in the above figure, increase Base Y.
If the printing and cutting positions are offset at a location distant from the origin as shown in the following figure even after adjusting the positions with Base X and Base Y values, it is possible that the distance between the printed crop marks is offset from the settings (W and L). This may be due to the expansion or contraction of the material or distortion in the printing. Proceed to step 4.
Just the part that is distant from the origin is offset.
|
 |
(1): Origin
(2): Cutting line
(3): Printing position
|
The actual distance is longer than the W and L settings.