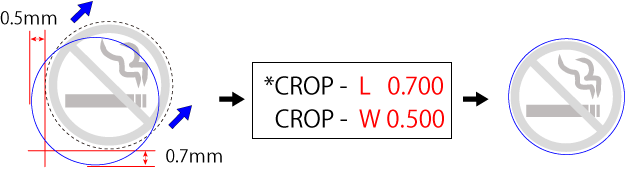
If the printing position and the cutting position are offset as shown in the following figure, you can correct the issue by adjusting either the printing position or the cutting position. This example shows the procedure for adjusting the cutting position.
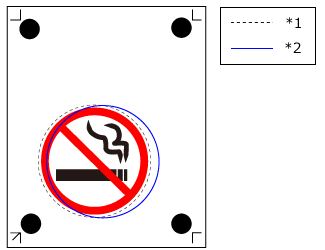 |
*1: Intended cutting line *2: Actual cutting line |
CROP-L/W Values
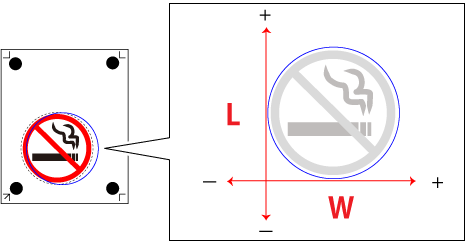
Input range: -25 mm to 25 mm
To move the cutting line 0.5 mm to the left → Enter the W value
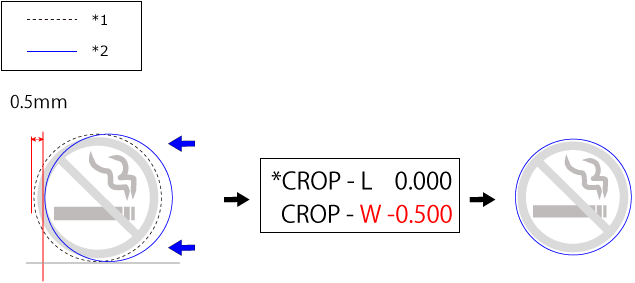
*1: Intended cutting line *2: Actual cutting line
To move the cutting line 0.5 mm down → Enter the L value
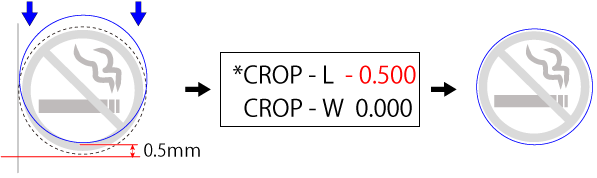
To move the cutting line 0.7 mm up and 0.5 mm to the right → Enter both W and L values
1. Set the CROP-L value.
Make sure the material is loaded in the machine.
- Press [MENU] several times to display the screen shown in the figure.

- Press [
 ] several times to display the screen shown in the figure.

- Press [
 ].
].
- Press [] several times to display the screen shown in the figure.

- Press [] twice.
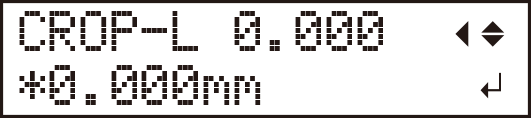
The screen shown in the following figure is displayed. First enter the CROP-L value.
- Use [
 ] and [] to enter the value.
Refer to the section above titled "CROP-L/W Values" to enter the values.
- Press [ENTER].
The screen shown in the following figure is displayed.

- Press [].
The screen shown in the following figure is displayed. Enter the CROP-W value.

- Press [].
- Use [] and [] to enter the value.

- Press [ENTER].
When you have finished, press [MENU] to return to the screen in the figure.

- Send the cutting data.
Perform cutting again and check the cutting position.
2. Set the CROP-W value.