The application of tags (labels) serves primarily to facilitate the fast and secure identification of machined parts.
There are several options for automatic naming available, but you can also specify completely customized labels.
Left-click the desired place to create the tag according to the current profile and selected mode .
|
Profile
|
|
|
|
|

|
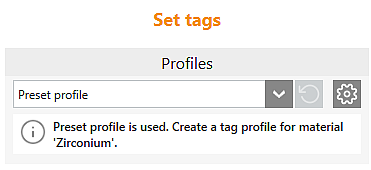
Select profile (template)
|
Select a preset profile from the drop-down list. Profiles must first be defined in the Part identification settings.
|

|
Settings for profiles
|
Direct jump to the Part identification settings for defining tag profiles
|

|
Reset
|
Reset individual changes
|
Parameter
|
|

|
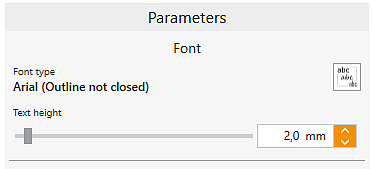
Font type
|
Change/Select fonts
|
|
Text height
|
The text height can be adjusted using the slider, by direct entry in the number field, or using the step mode (up and down arrow keys).
|
Inhalt
|
|
|
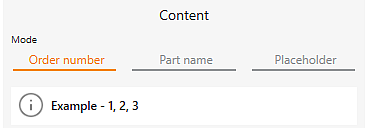
Order number
|
In this mode, the parts are numbered in the order in which they are loaded into the blank.
|
|
|
|
|
|
|
|
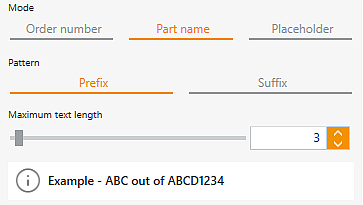
Part name
|
In this mode, the tag consists of a part of the part name.
|
|
Prefix
|
Several characters at the beginning of the part name are used as the tag.
|
|
Suffix
|
Several characters at the end of the part name are used as the tag.
|
|
Maximum text length
|
Use the slider, direct entry into the number field, or the step mode (up and down arrow keys) to set the number of characters to be used from the part name.
|
|
|
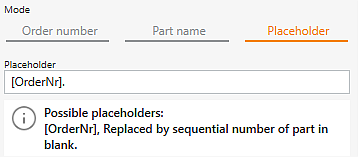
Placeholder
|
In this mode, you can use a placeholder and/or enter text freely.
|
|
[OrderNr]
|
The [OrderNr] placeholder generates a numbering of the parts in the order in which they are loaded into the blank. After the placeholder, you can also freely enter:
|
Placement
|

|
|
Is occlusal
|
When you tick this box, the tag is preferably placed on the occlusal side.
|
|
|
|
|
Grafikfenster
|

|

|
Delete tag
|
Select tag on the part and delete it using this button.
|

|
Move tag
|
Holding the left mouse button down, move the tag to the desired position. Alternatively, double-click the tag on the part to enter this mode.
|

|
Set tag machining direction
|
Clicking the button adjusts the machining direction to the current viewing direction. To use a custom machining direction, it must be activated in the corresponding machining task in the template.
The machining direction can only be inclined up to the max. tilt angle for parts that applies to the currently selected machine!
|
|
|
|
|
|
|
|
|
|
|
|
|
![]() Tags
Tags


