| Cutting the Printed Material |
When cutting material using a program other than the included program, manually enter in the machine the distance between the crop marks and positions that were used when creating the image.
- Create the data and print.
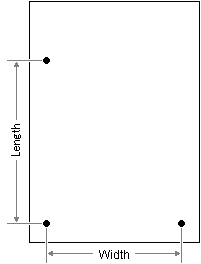
When creating the data, refer to Shape and Layout of Crop Marks to position the crop marks.
Keep a note of the distance between the centers of the crop marks.
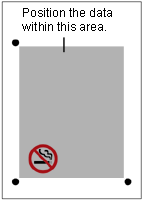
Draw the illustration in the area within the crop marks, and print it.
- Refer to Cutting by Automatically
Aligning the Position to load the material, and make the machine
ready for cutting (setup condition).
Position the crop marks above the blade protector.

- Press the MENU key several times to display the screen in the
figure.

Press the key twice.

- Press the
 key.
key.
Press the and
and  keys to select MANUAL.

Press the key twice.

- Press the
 and
and  keys to enter the origin position after the crop mark detection (width
direction).
Normally, enter the radius of the crop marks (5.0 mm).
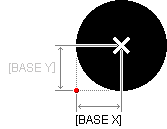
Press the ENTER key to enable the setting.

- Press the
 key.
key.
Press the key.
key.

- Press the
 and
and  keys to enter the origin position after the crop mark detection (length
direction).
Normally, enter the radius of the crop marks (5.0 mm).
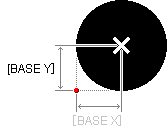
Press the ENTER key to enable the setting.

- Press the
 key.
key.
Press the key.
key.

- Press the
 and
and  keys to enter the distance between the center of the crop marks (width
direction).
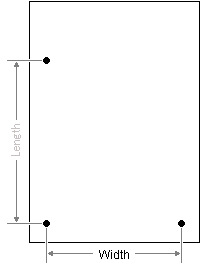
Press the ENTER key to enable the setting.

- Press the
 key.
key.
Press the key.
key.

- Press the
 and
and  keys to enter the distance between the center of the crop marks (length
direction).
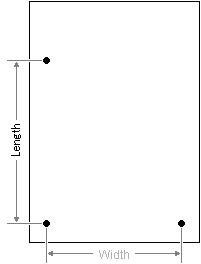
Press the ENTER key to enable the setting.

- Press the
 key.
key.

Press the ENTER key to start the reading of the crop marks.
The display shows the progress while the crop marks are being detected. When the operation is finished, the screen in the figure appears.

The reading of the crop marks is complete, and the machine is ready to receive data from the computer.