This example uses flat, A4-size material to explain how to load the material.

This example uses flat, A4-size material to explain how to load the material.
Procedure
Check that the pinch rollers have risen.
For A4-size material, do not use the middle pinch rollers.
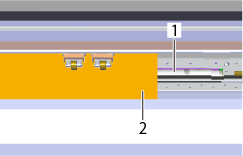 |
1: Grit roller 2: Right edge of the material |
At this point, check that the right edge of the material remains over the grit roller on the right edge.
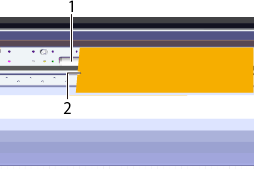 |
1: Grit roller 2: Left edge of the material |
Align the right edge of the material so that it is parallel to the gradations of the rulers (in two locations: one on the top and one on the bottom).
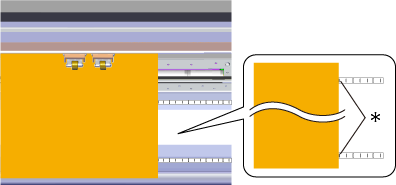
*: Ruler gradation
Position the pinch rollers on the edges so that each one is 25 mm or more inside of the respective left or right edge of the material.
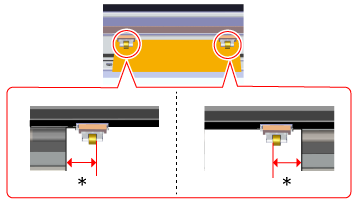
*: 25 mm or more
The middle pinch rollers are not used with A4-size material. However, when you are using these rollers to load material, place them over their corresponding grit rollers.
The pinch rolls lower and the carriage and material move.
When the movement is finished, the cuttable width and length are displayed.

If the condition of the material is as described below, stretch or flatten it before use.
The material is curled upward.
The leading edge of the material is bent or creased.