CAUTION
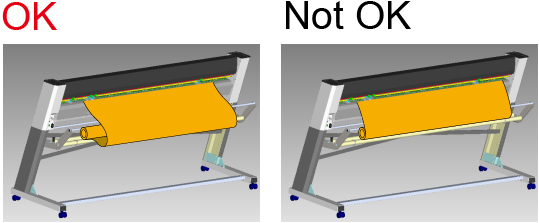
Load roll media correctly.
Otherwise the media may fall and cause injury.
CAUTION
Roll media weighs about 40 kg (88.19 lb.). To avoid injury, handle it with care.
CAUTION
Never load media that weighs over 40 kg (88.19 lb.).
The machine may fail to withstand the weight, causing the machine to tip over or the material to fall.
Procedure
-
Switch on the power.
The power turns on and the cutting carriage moves to the right edge.
Exercise caution to avoid touching the cutting carriage.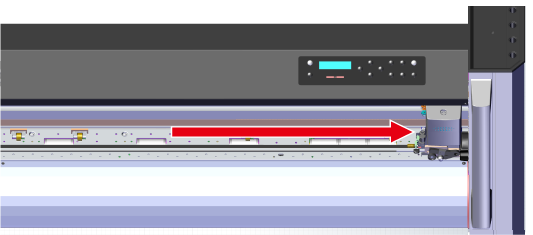
-
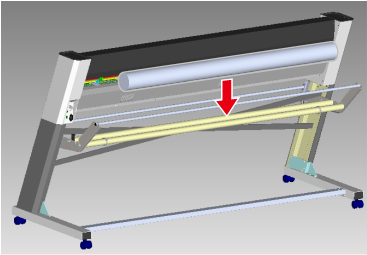
Place the roll material on the shaft at the back of the machine.
-
Pull the roll material out to the front of the machine.
Release the brake, and then pass the leading edge of the roll material between the pinch rollers and the grit rollers.
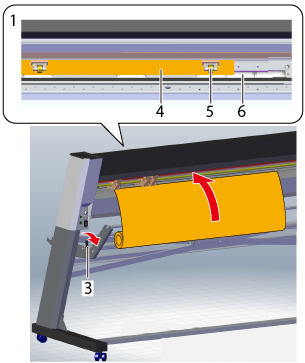
Exercise caution to prevent the material from touching the shaft of the pinch rollers.
The shaft is coated in grease, so grease may be transferred from the shaft surface to the material if they come in contact with each other.
1: Machine front
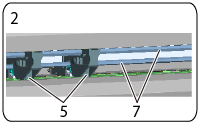
2: Machine back
3: Brake
4: Roll material
5: Pinch rollers
6: Grit rollers
7: Pinch roller shaftPull out a length of material that is slightly long, leaving some slack.
If you load the material without creating some slack, the material cannot be fed correctly.
-
Place the right edge of the roll material over the grit roller (on the right edge).
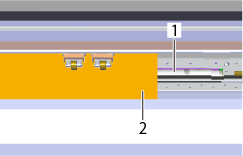
1: Grit roller
2: Right edge of the roll material -
Slide the roll material to place its left edge over the grit roller.
At this point, check that the right edge of the roll material remains over the grit roller on the right edge.
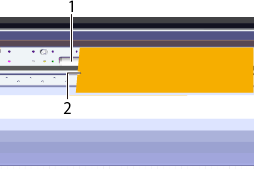
1: Grit roller
2: Left edge of the roll material -
Straighten the roll material.
Align the right edge of the roll material so that it is parallel to the gradations of the rulers (in two locations: one on the top and one on the bottom).
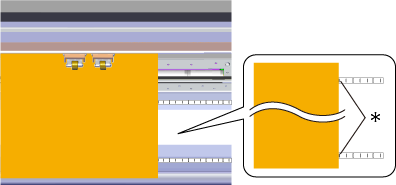
*: Ruler gradation -
Place the left and right pinch rollers over the grit rollers on both edges of the roll material and the middle pinch rollers over their corresponding grit rollers.
Position the pinch rollers on the edges so that each one is 25 mm or more inside of the respective left or right edge of the roll material.
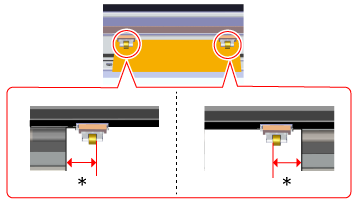
*: 25 mm or more -
Press [ENTER].
The pinch rollers lower to secure the roll material in place.
Also, the cutting carriage moves to the origin and the width of the roll material is shown on the display.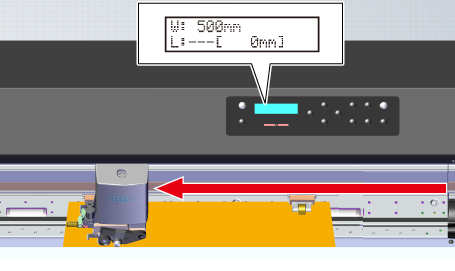
Handling Error Messages
If the following error message appears on the display, one of the pinch rollers is not in the correct position.
![]()
Follow the procedure shown below to place the pinch rollers in the correct positions.
Procedure
-
Press [ENTER].
The cutting carriage moves to the right edge, and the following screen is shown on the display.
-
Press [PINCH].
The pinch rollers rise up.
-
Place the pinch rollers in the correct positions.
Place them so that each is positioned over a grit roller.
Position the pinch rollers on the edges so that each one is 25 mm or more inside of the respective left or right edge of the roll material. -
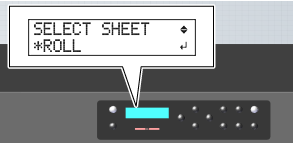
Press [ENTER].
When the pinch rollers are all placed in the correct positions and the loading of the roll material is complete, the following screen appears.

Accurately Feeding Roll Material
Materials That Require Feeding
Roll material and long, flat material that is longer than 1.6 m (63 in.)
Procedure
-
Press [MENU] several times to display the screen shown in the figure.

-
Press [
 ] to display the screen shown in the figure.

-
Press the [
 ] key, and then the [
 ] key.
The screen shown in the figure below is displayed.

-
Press [].
-
Press [] or [] to set the value for the required length of the material to cut.
It is a good idea to set a value that is about 0.2 m (7.9 in.) longer than the required material length.

-
Press [ENTER].
The set length of the material moves out to the front, then is immediately pulled back and taken up again.
Press the [MENU] key to return to the screen shown in the figure.
If the Material Comes Loose
If the material comes loose from the pinch rollers, press the [PAUSE] key to stop operation. Then reload the material, starting over from the beginning.