To obtain high-quality cutting results, carry out a cutting test to check the cutting quality for the material before you perform the actual cutting.
Procedure
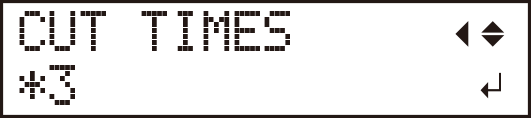
Setting the Number of Cutting Tests to Perform
-
Check that the PEN FORCE slider is at the center position (at "0" on the scale).

-
Press [CUT CONFIG] to display the following screen.

-
Press [
 ] to display the following screen.
-
Press [
 ] or [
 ] to set the number of cutting tests to perform.
Cutting tests in three locations: Status of the finished product

Cutting test in one location: Status of the finished product

-
Press [ENTER] to select the setting.
You are returned to the following screen (in this example, three cutting tests will be performed).
-
Press [ENTER].
The test pattern is cut.
 The position of the blade at the time the button is pressed is the cutting test start position.
You can use the cursor keys to set the position as desired.When the cutting test finishes, the material is automatically fed to the front. -
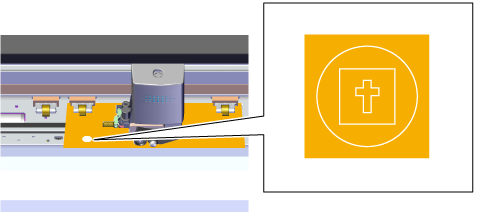
Peel off circle 1.
Use the tweezers or a similar tool to peel off the cut shape, and then check the cutting quality.

Circle 1 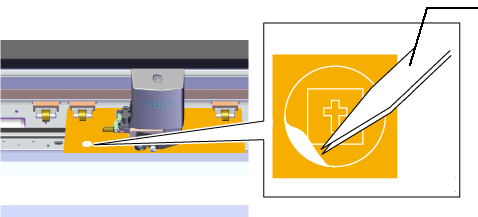
Tweezers If Circle 1 Peels Off Alone → Step 8

*: Circle 1 If Other Shapes Also Peel Off/The Machine Cuts the Carrier Paper → "Changing the Blade Force"
-
Peel off rectangle 2.
Use the tweezers or a similar tool to peel off the cut shape, and then check the cutting quality.

Rectangle 2 If the Blade Leaves Faint Traces on the Material's Carrier Paper → Setting the Origin

Faint lines remain here. If the Traces Left by the Blade Are Indistinct/Too Deep → "Changing the Blade Force"