Convex envelope
|
|
Yes
|
Create a convex envelope and place it around the part to calculate the toolpaths.
|
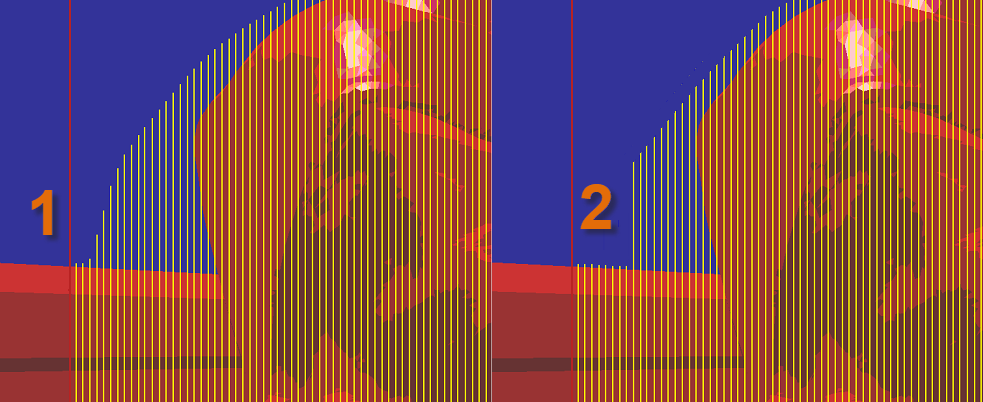
The convex envelope prevents excessive axial infeed (2), e.g., in 5X Z-level finishing, and leads to greater safety during the grinding process.

1) Toolpaths with convex envelope
2) Toolpaths without convex envelope
Since the highest point of the margin line (1) coincides with the convex envelope and the milling path always starts at the highest point when finishing the margin line and the coping/inlay, this also improves the safety during grinding.

|
Extrude margin
|
Shift the beginning of the milling paths beyond the machining boundary (1) in order to safely machine even complex inlays/onlays with simultaneous offset for cutter radius + allowance + tolerance (steep areas). This option can be used for roughing and finishing.
|

|
No
|
No extension of the machining boundary.
|
Maximum of part
|
Extension up to the maximum machining boundary of the part.
|
Maximum of blank
|
Extension to the highest point of the blank end.
|
Top of blank
|
Extension to the blank surface.
|
Automatic
|
Automatic extension by the program.
|
Distance to connection point
|
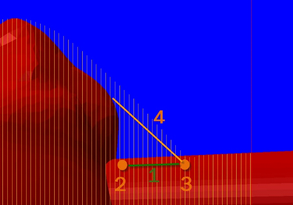
The distance (1) between the connection point of the connector on the part (2) and the end of the convex envelope in the center of the connector (3) determines the shape of the convex envelope (4).
|

1) Distance to connection point
2) Connection point on the part
3) End point of the convex envelope
4) Convex envelope
|
Spiral equidistant finishing
|
The toolpaths run spirally from the inside to the outside at equal distances.
|

|
Machining direction
|
|
From inside to outside
|
|
From outside to inside
|
|
Offset
|
mm
Default value for machining from the outside to the inside.
|
Offset inner boundary (margin line)
|
mm
Default value for the inner machining boundary (margin line).
|
Offset outer boundary
|
mm
Default value for external processing limit.
|
|
|
|
|


