|
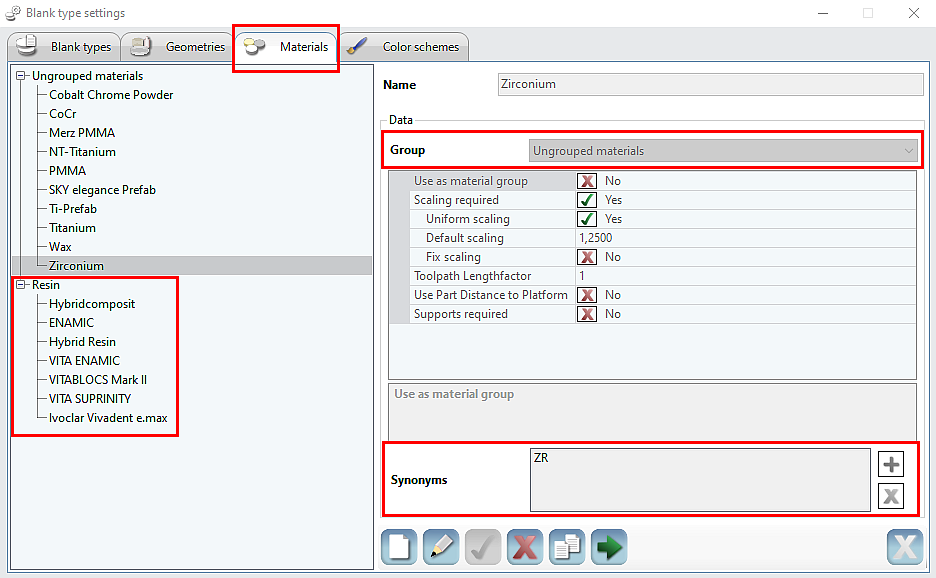
The materials that are defined here form the basis for the material selection when you create the blank types.
Suitable default templates can be assigned to the material. This simplifies and speeds up the later task of setting the process parameters.
|
|

|
|
1) In the [Settings] menu, call up the [Blanks] > [Blank types…] menu item.
2) Click the [Materials] tab.
3) Newly create, edit, use, delete, copy material.
|
|
Name
|
You can freely assign a name to the material.
Assign a name, preferably with reference to the material, e.g., “CoCr” for a cobalt-chrome alloy.
|
|
Group
|
Assignment of the active material to a material group.
|
|
Use as material group
|
The active material is turned into a material group.
|
|
Scaling required
|
Scaling is required if the material needs postprocessing that will result in a change of its size, e.g., shrinking when sintering zirconium oxide.
|
|
Uniform scaling
|
Resizing is the same in all axes.
|
|
Yes
|
|
|
Default X scaling
|
Default value for uniform scaling.
|
|
No
|
|
|
Preset X-, Y-, Z-scaling
|
Default values for variable scaling in the X-, Y-, and Z-direction.
|
|
Fix scaling
|
Set the resizing to the default scaling value defined here. The scaling now cannot be changed when creating new materials and loading blanks.
|
|
Toolpath lengthfactor
|
Factor for adjusting the toolpath to different materials for controlling tool changes (OEM-specific special function).
|
|
Use part distance to platform (hybrid)
|
Distance of the newly loaded part to the building platform.
|
|
Supports required (hybrid)
|
Support structures (supports) are created automatically.
|
|
Synonyms
|
Alternative designations (synonyms) for the material. Add/Remove synonyms.
|
Material groups
Material groups were introduced with the aim of improving the automatic blank proposal and reducing the number of templates. The groups make it possible to combine different materials that are to be processed with the same template while retaining the different material types, which are required for the blank proposal.
|
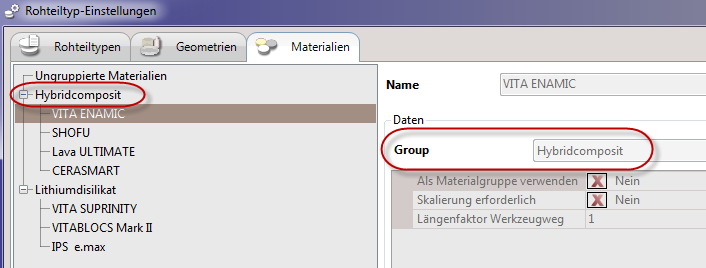
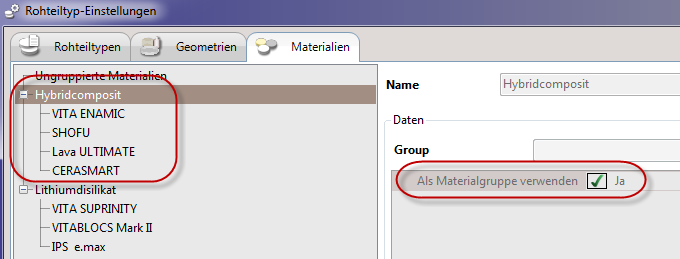
Example: Hybrid composite material group containing the materials VITA ENAMIC, SHOFU, Lava ULTIMATE and CERASMART.
Navigate to Materials > Data > Group to assign materials to the group!

Any material created can be used as a material group. To do so, go to Materials > Data and enable the check mark in the “Use as material group” option.

This allows you to select the material groups using all previous settings and filter options for materials (project manager, load blank dialog, milling strategies, fixtures...).
|


