|
|
|

|
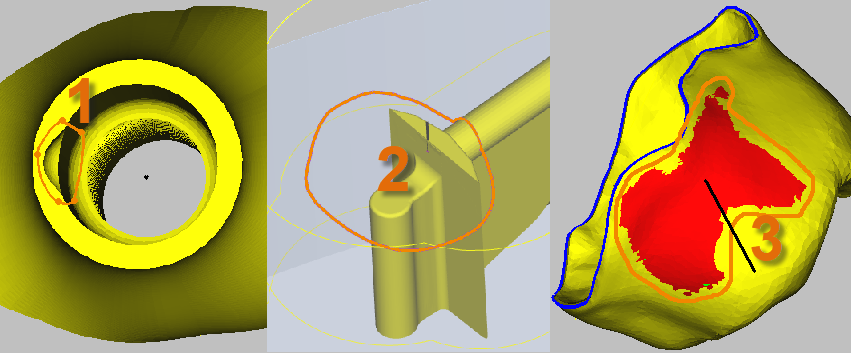
By highlighting user-defined areas, you can additionally machine any areas, for example, high-quality geometries (1, 2) or undercuts (3). The ability to categorize custom areas allows for machining these in a variety of ways. The machining operations assigned to the respective category must be stored in the template.
User-defined areas are set from an individual insertion direction. Align the part accordingly. Pay attention to the machine’s capabilities and accessibility of the tool!
Once the first point has been set, rotation of the view is disabled.
|
Zeichenmodus
|
|
|
|

|
|
|
|
Type
|
|
|

|
User-defined area
|
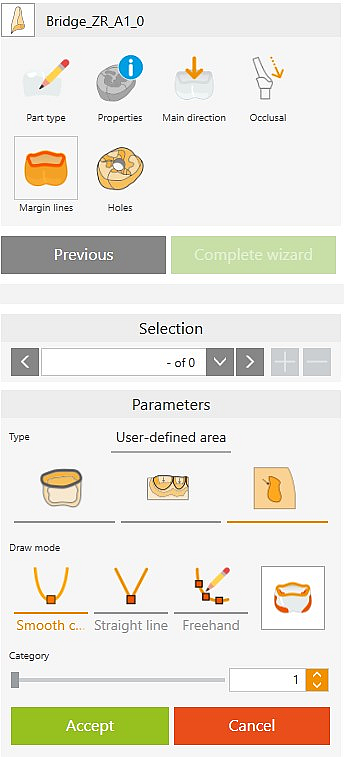
To define custom ranges, under Type, click the User-defined area button.
|
Initialization mode
|
|

|
Span by yourself
|
This function allows the delimitation of an area by manually defining a curve (polyline).
|

|
Select from undercut area
|
The undercut areas in relation to the current main machining directions are shown. A curve for defining undercut areas is automatically generated when selected.
|

|
Show undercut areas
|
Undercut areas are calculated from the main direction and displayed in red.
|
 Span by yourself Span by yourself
|
Hinterschnittbereiche anzeigen
|
User-defined areas are machined in the view direction active when they are defined. After setting the first point, the view is locked until you complete the curve definition. The machining direction can be changed later.
|

|
Smooth curve
|
Initially, you must set three points at the edge of the area to be bounded by clicking with the left mouse button. The points are automatically connected via polynomials . Add extra points by clicking between two existing points. Press and hold the mouse button to move points.
|

|
Straight line
|
Initially, you must set three points at the edge of the area to be bounded by clicking with the left mouse button. The points are automatically connected via straight lines . Add extra points by clicking between two existing points. Press and hold the mouse button to move points.
|

|
Freehand
|
Create contour with a freehand line. Hold down the left mouse button and manually trace the precise area.
|
|
 Select from undercut area Select from undercut area
|
|
By clicking the Select from undercut area, the current undercut situation is calculated and displayed in red. Left-click into an undercut area to automatically highlight the portion visible in the current view in a curve frame. The active view is used as the machining direction.
For parts that consist of several non-contiguous elements, only the portion of the element in which the undercut area was selected is shown in a frame!
|
|
|
Category
|
.. 0 ... 9 ... n
This number is used to activate the machining steps associated with the corresponding number from the template.
|
|

|
Accept
|
The current contour with category is applied. You can add further boundaries.
|
|

|
Cancel
|
Cancel current definition
|
![]() User-Defined Areas
User-Defined Areas


