The [Job Settings] window appears.
 .
.
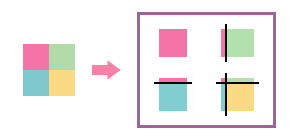
Top-Left
Creates overlap widths at the top and left of tiles.

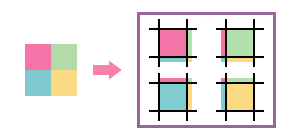
ALL Corners
Creates overlap widths around each tile.

Creates overlap widths at the top and left of tiles.

ALL Corners
Creates overlap widths around each tile.


Tip
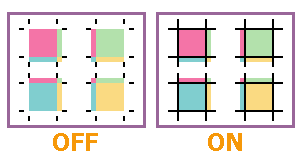
- You can set the thickness and the color of overlap lines.
- Enter a numeric value in [Thickness] in [Overlap].
- Click [Color Settings].
The [Color Settings] window appears. - Select [RGB] or [CMYK] from [ColorSpace], and then adjust the slider bars or enter the values for each color.
- Click [OK].


