|
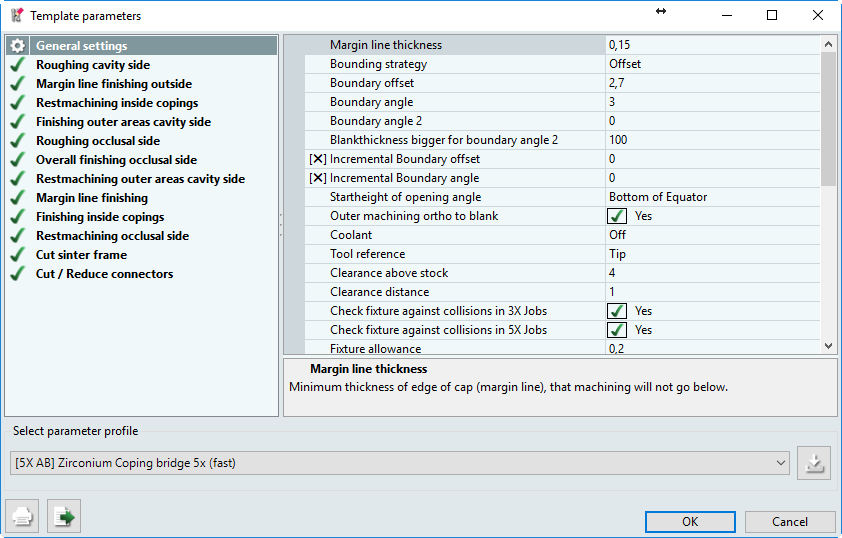
The first entry, [General settings], cannot be deleted or moved.
|
This is followed by the list of individual jobs that are completed in turn in the order that is shown, along with the associated parameters.
|
The display screen on the right shows the parameters associated with the selected job.
|
Changing the column width
|
|
Click the boundary line to the right of the column, hold the mouse button down, and adjust the width.
|
|
Or
|
|
Double-click the boundary line to the right of the column:
The column width is set to the predefined width or the maximum width of the content or the heading.
|
Enable/disable job
|
|
Only activated processing types (jobs) are processed during calculation. Disabled jobs are not processed.
|
|
1) Select the job and enable or disable it: Double-click the checkmark in front of the selected job:
|

|
Enabled
|
The job is enabled and processed.
|

|
Off
|
The job is disabled and excluded from processing. The job and its parameters remain in the list.
|
Adding a job
|
|
1) Click the job list, call up the context menu, and select the [New job] menu item.
|
|
Either
|
|
2) Open the group (Roughing, etc.) and select the job.
|
|
Or
|
|
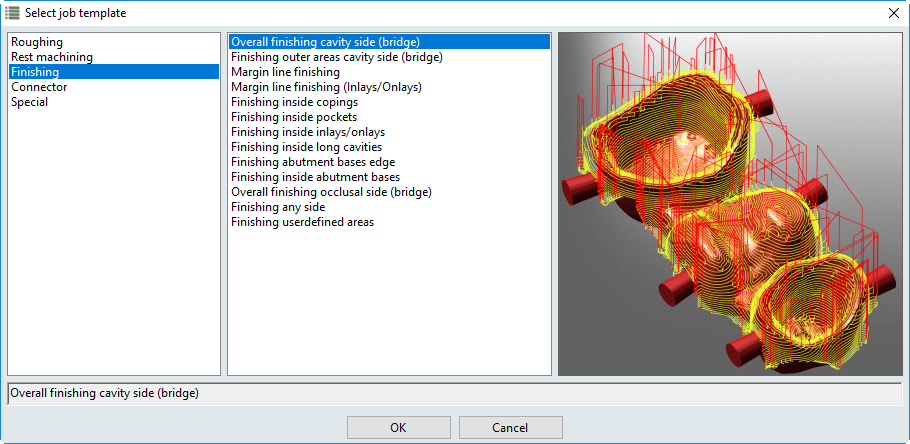
3) Open the [Show job template selection dialog] menu item.
|
|
The window shows the groups and jobs, as well as a preview of the application type and toolpaths.

|
|
4) Selecting a new processing type (job): Click the group and then double-click the job.
|
|
The selected job is displayed at the end of the job list.
|
|
5) If necessary, move the job to the correct position in the job list.
|
|
6) If necessary, edit parameters and select the cycle.
|
Moving a job
|
|
1) Select the job and, while holding the left mouse button down, move it to the new position in the job list: The job is displayed at the new position.
|
Deleting a job
|
|
1) Select one or more jobs, call up the context menu, and select the [Delete job] menu item: The job is removed from the list.
|
Copying a job
|
|
1) Select the job, open the context menu, and select [Copy job]: The job is copied and entered with an index below the selected job in the job list.
|
Copy job to clipboard
|
|
Select job, open context menu and select menu item [Copy job to clipboard]: The job is saved to the clipboard and can be inserted, for example, in another template using the [Paste jobs from clipboard] function. Function also allowed with multiple selection.
|
Exchanging a job
|
|
1) Select the job, open the context menu, and select the [Exchange job] menu item: The menu for the new jobs is displayed.
|
|
2) Either open the group and select the job, or open the [Show job template selection dialog] menu item, open the group and select the job. The parameters of the new job are displayed in the job list instead of the parameters of the selected job; the job name remains the same.
|
|
3) Adjusting a job name: Adjust the displayed job name to the actual job (--> hyperDENT job name) to avoid confusion and incorrect machining.
|
Changing a job name
|
|
1) Select the job, open the context menu, and select the [Exchange job] menu item: The menu for the new jobs is displayed.
|
|
Make sure that the job name refers to the actual job to avoid confusion and incorrect processing.
|
|


