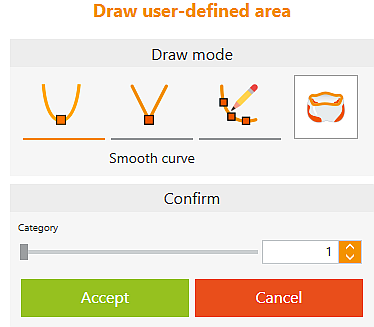
After nesting a part in the blank, in the Edit and Check step you can define areas that are to be machined separately.
This can be, for example, the reworking of contact surfaces to the gum or also, for example, attachments.
|
 Span by yourself Span by yourself
|

|

|
Smooth curve
|
Initially, you must set three points at the edge of the area to be bounded by clicking with the left mouse button. The points are automatically connected via polynomials . Add extra points by clicking between two existing points. Press and hold the mouse button to move points.
|

|
Straight line
|
Initially, you must set three points at the edge of the area to be bounded by clicking with the left mouse button. The points are automatically connected via straight lines . Add extra points by clicking between two existing points. Press and hold the mouse button to move points.
|

|
Freehand
|
Create contour with a freehand line. Hold down the left mouse button and manually trace the precise area.
|

|
Category
|
Undercut areas are calculated from the main direction and displayed in red.
|
|
Category
|
.. 0 ... 9 ... n
This number is used to activate the machining steps associated with the corresponding number from the template.
|

|
Accept
|
The current contour with category is applied. You can add further boundaries.
|

|
Cancel
|
Cancel current definition
|
|
|
|
|

|

|
Delete margin line
|
Margin lines can be deleted using this button.
|

|
Edit margin line
|
Margin lines can be edited using this button.
|

|
Machining direction from view
|
The machining direction can be set here according to the current view.
|
|
|
|
|
|
![]() User-Defined Areas
User-Defined Areas


