| Preparing for Cutting |
[Next]
Loadable Material Sizes
| Width: | 50 to 700 mm |
| Length: | Flat Material: 100 mm or more, Roll Material: no restriction |
Loading Procedure
- Make sure the loading
lever is lowered.
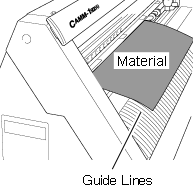
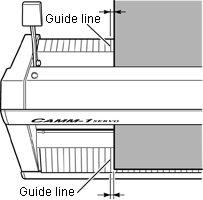
- Pass the material through the machine, and pull out the material until
its leading edge is positioned over the guide
lines.
• Using the roller base
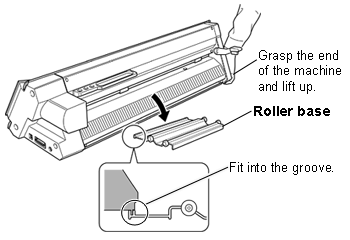
Pull out a length of material that is slightly longer than the amount needed for cutting, leaving some slack.
If you don't, the material cannot be fed correctly.
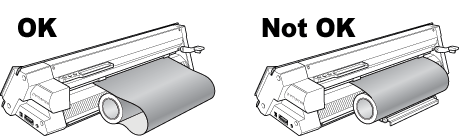
• Not using the roller base
In the case of a roll material, cut off the amount of material needed for cutting.
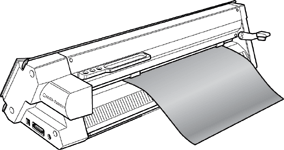
- Align the left edge of the material within the boundaries of the wide
marks at the far left, and align the right edge within the boundaries
of one of the narrow marks.
Reference: Loading Position of Material
- Move the pinch
rollers so that they are positioned at the edges of the material
and also inside the areas of the pinch-roller position-verification marks.

Be careful to position the pinch rollers so that they are not too close to the edges of the material and do not extend beyond the edges of the material.
• Using roll material or lengthy flat material
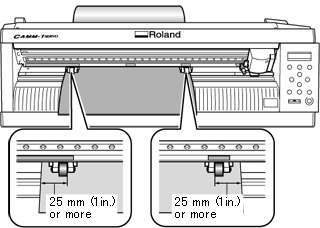
Position the pinch rollers so that each one is 25 mm (1 in.) or more from the respective left or right edge of the material.
- Align the left edge of the material so that it lies parallel to the
guide lines.
- Raise the loading lever.
The material is secured in place.
* Do not use excessive force when moving the loading lever. Doing so may damage it.
* If the condition of the material is as described below, then stretch or flatten it before use.
• The material is curled upward.
• The leading edge of the material is bent or creased.