| Printing and Cutting (When Using CutStudio) |
Step 1: Create
the data
-
Start CutStudio.
-
From the File menu, click Cutting Setup.
The Cutting Setup dialog box opens.
Select Roland GX-24 for the Name.
-
From the File menu, click Print & Cut.
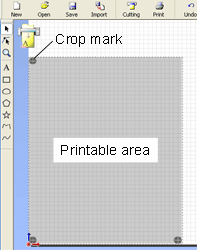
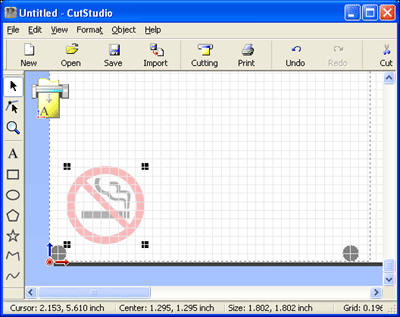
The print range and crop marks are displayed on the screen.
The print range is displayed with dotted lines. This range corresponds to the paper size specified in Set up the printer excluding the margins specified in Printing Setup.
-
From the File menu, click Set up the printer.
The Print Setup dialog box opens.
Select the paper size and click OK.
When expanded/reduced printing is enabled, disable it. Print at 100% scale.
For details, see the instruction manual for your printer.
-
From the File menu, click Printing Setup .
The Printing Setup dialog box opens.
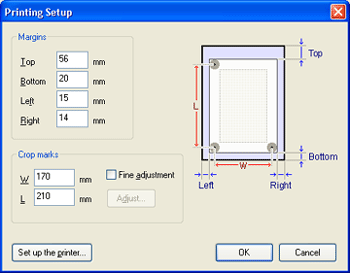
Set the margin and the distance between crop marks, and then click OK.
Take into account the margin necessary for cutting the material, and set the crop mark position.
When cutting with the GX-24, enter the following values.
Size Margin and crop mark settingsA4 portrait Top: 57 mm, Bottom: 20 mm, Left: 15 mm, Right: 15 mm
W: 170 mm, L: 210 mmA4 landscape Top: 60 mm, Bottom: 20 mm, Left: 30 mm, Right: 17 mm
W: 240 mm, L: 120 mmA3 portrait Top: 60 mm, Bottom: 20 mm, Left: 30 mm, Right: 17 mm
W: 240 mm, L: 330 mmA3 landscape Top: 62 mm, Bottom: 20 mm, Left: 15 mm, Right: 15 mm
W: 380 mm, L: 205 mmB4 portrait Top: 59 mm, Bottom: 20 mm, Left: 15 mm, Right: 17 mm
W: 215 mm, L: 275 mmB4 landscape Top: 57 mm, Bottom: 20 mm, Left: 15 mm, Right: 14 mm
W: 325 mm, L: 170 mm
* If you are using a material of size larger than A4 that is not listed above, set the values by referring to the figure below.
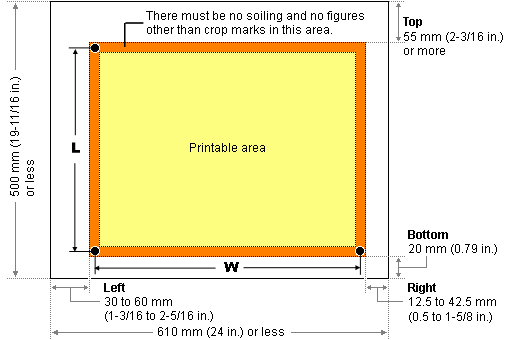
Hint:A bottom margin of 20 mm is adequate for all cases. It eliminates the hassle in loading the material.
Reference:Load the printed material
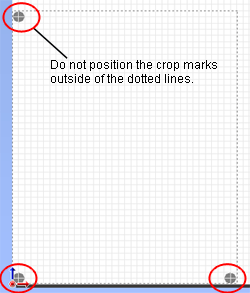
After setting the values, check that the crop marks are within the print range.
-
Click
 to import the image data you wish to print.
The imported image is displayed lightly.
* To change the density of the image display, open the General tab in the Preferences dialog box. For details, see "[Preferences] dialog box" in the CutStudio help.
The file formats that CutStudio can import are as follows:
JPEG and BMP formats
However, JPEG images saved with CMYK cannot be imported.
-
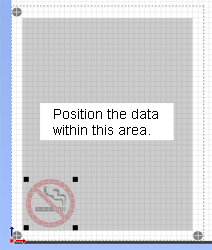
Position the data in the area within the crop marks.
-
Draw the cutting lines.

-
Save the data.