| Printing and Cutting (When Using CutStudio) |
Step 3: Load
the printed material
-
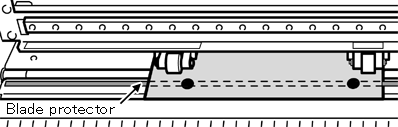
Pass the material through the machine and move the pinch rollers as shown in the figure.
• Position the pinch rollers outside the crop marks.
• Be sure that both edges of the material and the pinch rollers are inside the pinch-roller position-verification marks.
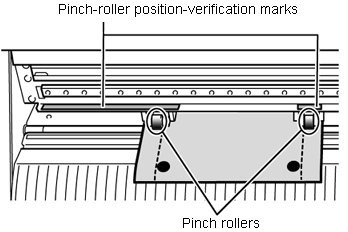
• Align the three crop marks as shown in the figure. If the material is loaded in the wrong direction, the GX-24 cannot read the crop marks.
-
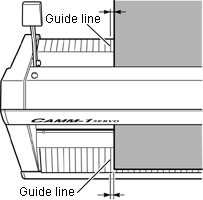
Align the left edge of the material so that it lies parallel to the guide line.
-
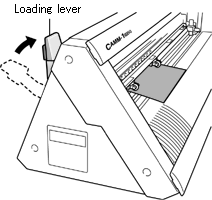
Raise the loading lever to secure the material in place.
-
Turn on the GX-24 power.
-
Select PIECE.

-
Use the cursor keys to move the material and position the crop marks above the blade protector.
* If the bottom margin was set to 20 mm, the crop marks are positioned above the blade protector when the loading is complete.
Note
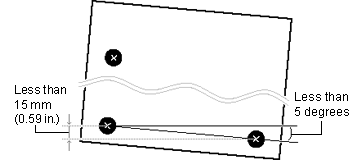
- Crop marks cannot be read in the cases indicated below. In such cases,
remove the material once and load it again.
• The left and right crop marks are slanted by 5 degrees or more with respect to the moving direction of the cutting carriage.
• The crop marks are offset by 15 mm in the material-feed direction.
- The material sometimes curls when it is printed on the printer.
Do not use a material that is curled as shown in the figure. The crop marks may not be read.
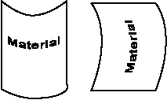
If this happens, straighten out the material before loading it on the GX-24.
- If the material has creases or wrinkles, stretch them out before loading
the material.
Crop marks may not be read if the material has creases or wrinkles. If the crop marks fail to be read, prepare a new material and repeat the operation from Step2: Print the data.