Step 2: Make the settings for the size and other parameters
Make the settings for the size (cutting area) of the loaded material.
The cutting area refers to the cuttable area of the material—that is, the area of the material minus the margins.
If you're using the GR, GS, or GX, you can get the information about the cutting area of the material from the machine after setup.
CutStudio displays the cutting area as a shaded rectangle.
Any object that protrudes beyond this area is not cut.
From the [File] menu, click [Cutting Setup].
The [Cut Setting] dialog box appears.
Click the drop-down arrow next to [Name] under [Printer], and select the driver to use as the output destination.
Click [Properties] or [Change] under [Media Size]. (The button to click varies according to model.)
The driver's properties appear.
Click the [Size] tab.
If you're using the GR, GS, or GX, click [Get from Machine].
The cutting area of the material loaded on the cutting machine is obtained and the values for [Width] and [Length] are entered.
Note, however, that when you have performed setup using [ROLL] or [EDGE], only the value for [Width] is acquired.
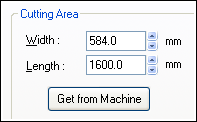
If you're using the SV-15, type in the values for [Width] and [Length]. If you're using the SV-12/8, type in the value for [Length].
For more information about the cutting range, refer to the user's manual for the SV series.
Click the [Settings] tab.
Click the drop-down arrow for [Setting], and then choose [Machine Setting].
(Depending on your model, this setting may not be configured here, and, as such, you may not be able to select an option. In this case, go on to the next step.)