What to Do First
After you have installed and set up the program, make the settings for the items shown below.
They enable you to output data from CutStudio to the cutting machine.
If the driver for the cutting machine is not installed, install it. For information on how to install the driver, refer to the documentation for the cutting machine.
The output-destination driver is stored in memory.
 Choosing the Driver
Choose the driver for outputting cutting data.
Choose the driver for the cutting machine that is the output destination.
Data cannot be output to the cutting machine if the wrong driver is selected or if the settings for the output port are incorrect.
- From the [File] menu, click [Cutting Setup].
The [Cut Setting] dialog box appears.
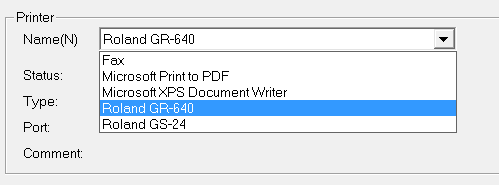
- Click the drop-down arrow next to [Name] under [Printer].

- Choose the driver for the cutting machine that is the output destination.
- Click [OK].
You set the output port when you install the driver.
If you want to change the port after the installation, follow the steps shown below.
 Output Port Setting
- In Windows, open the [Printers] folder (the [Printers and Faxes] folder or the [Devices and Printers] folder).
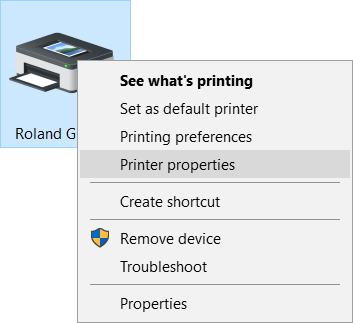
- Right-click the driver you selected with CutStudio.

- Click [Properties] (or [Printer properties]).
The driver's properties are displayed.
- Click the [Details] tab or the [Port] tab.
- Choose the port for the output destination.
 Choosing the Driver
 Choosing the Driver
 Output Port Setting